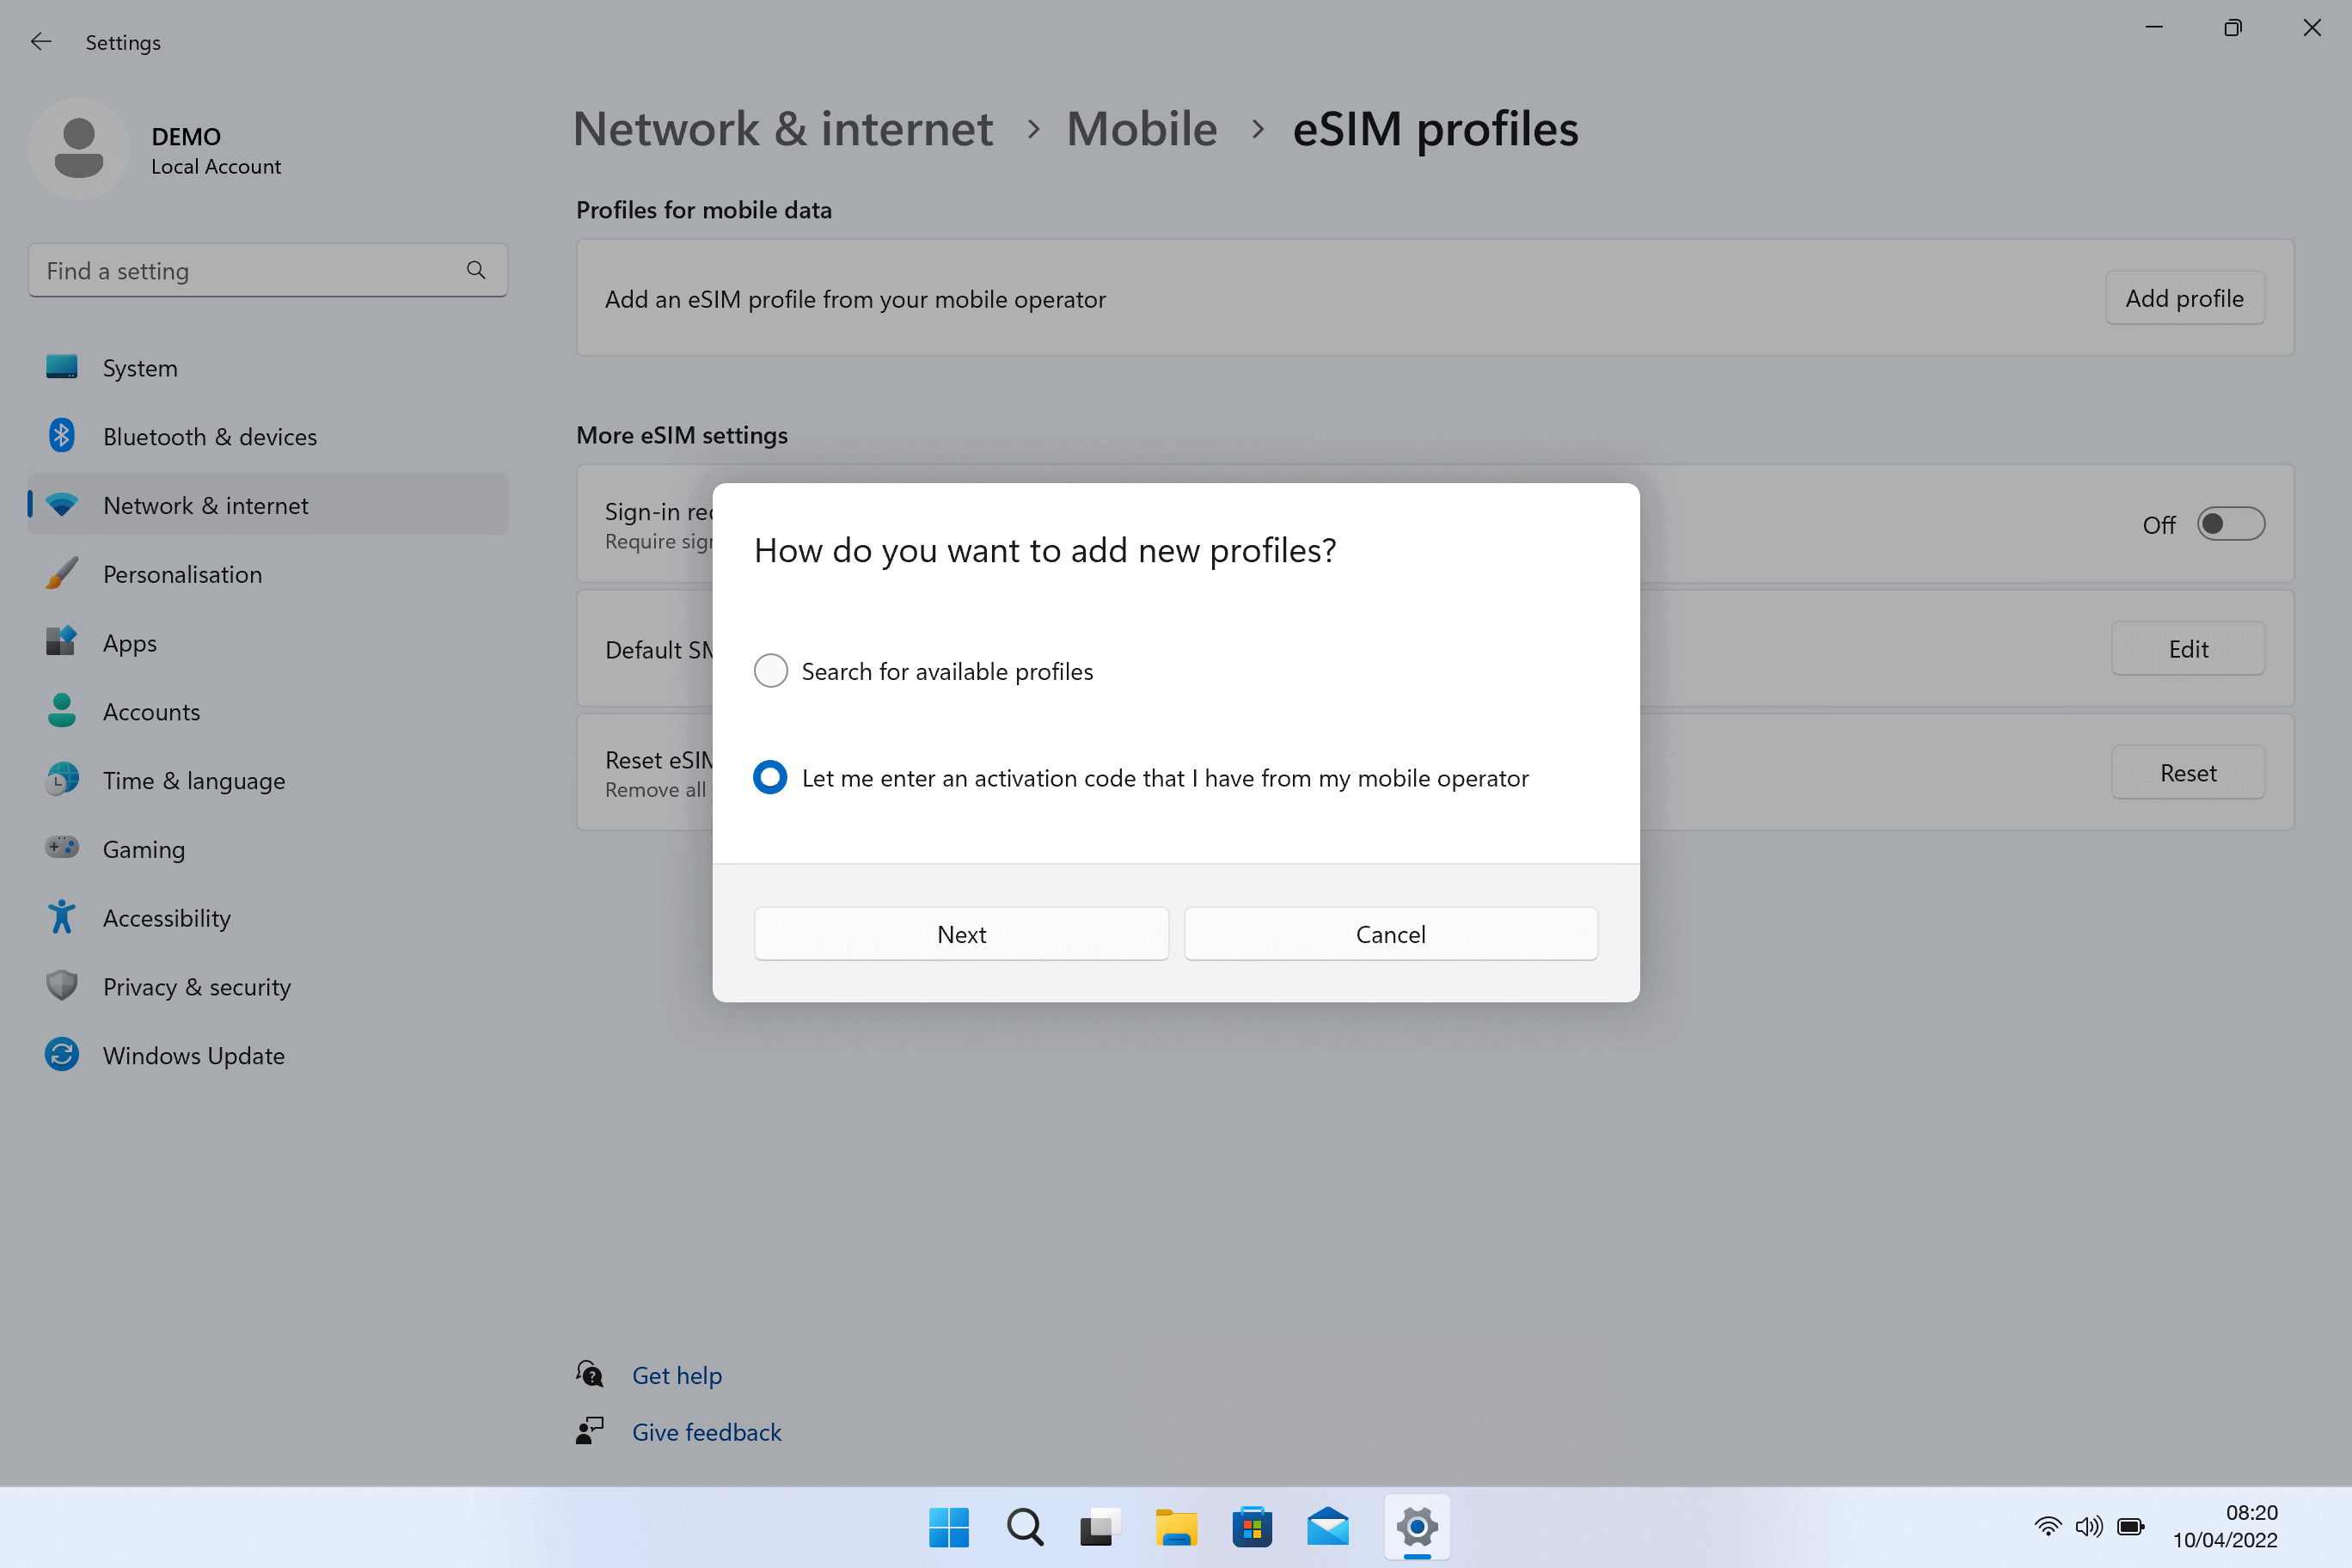
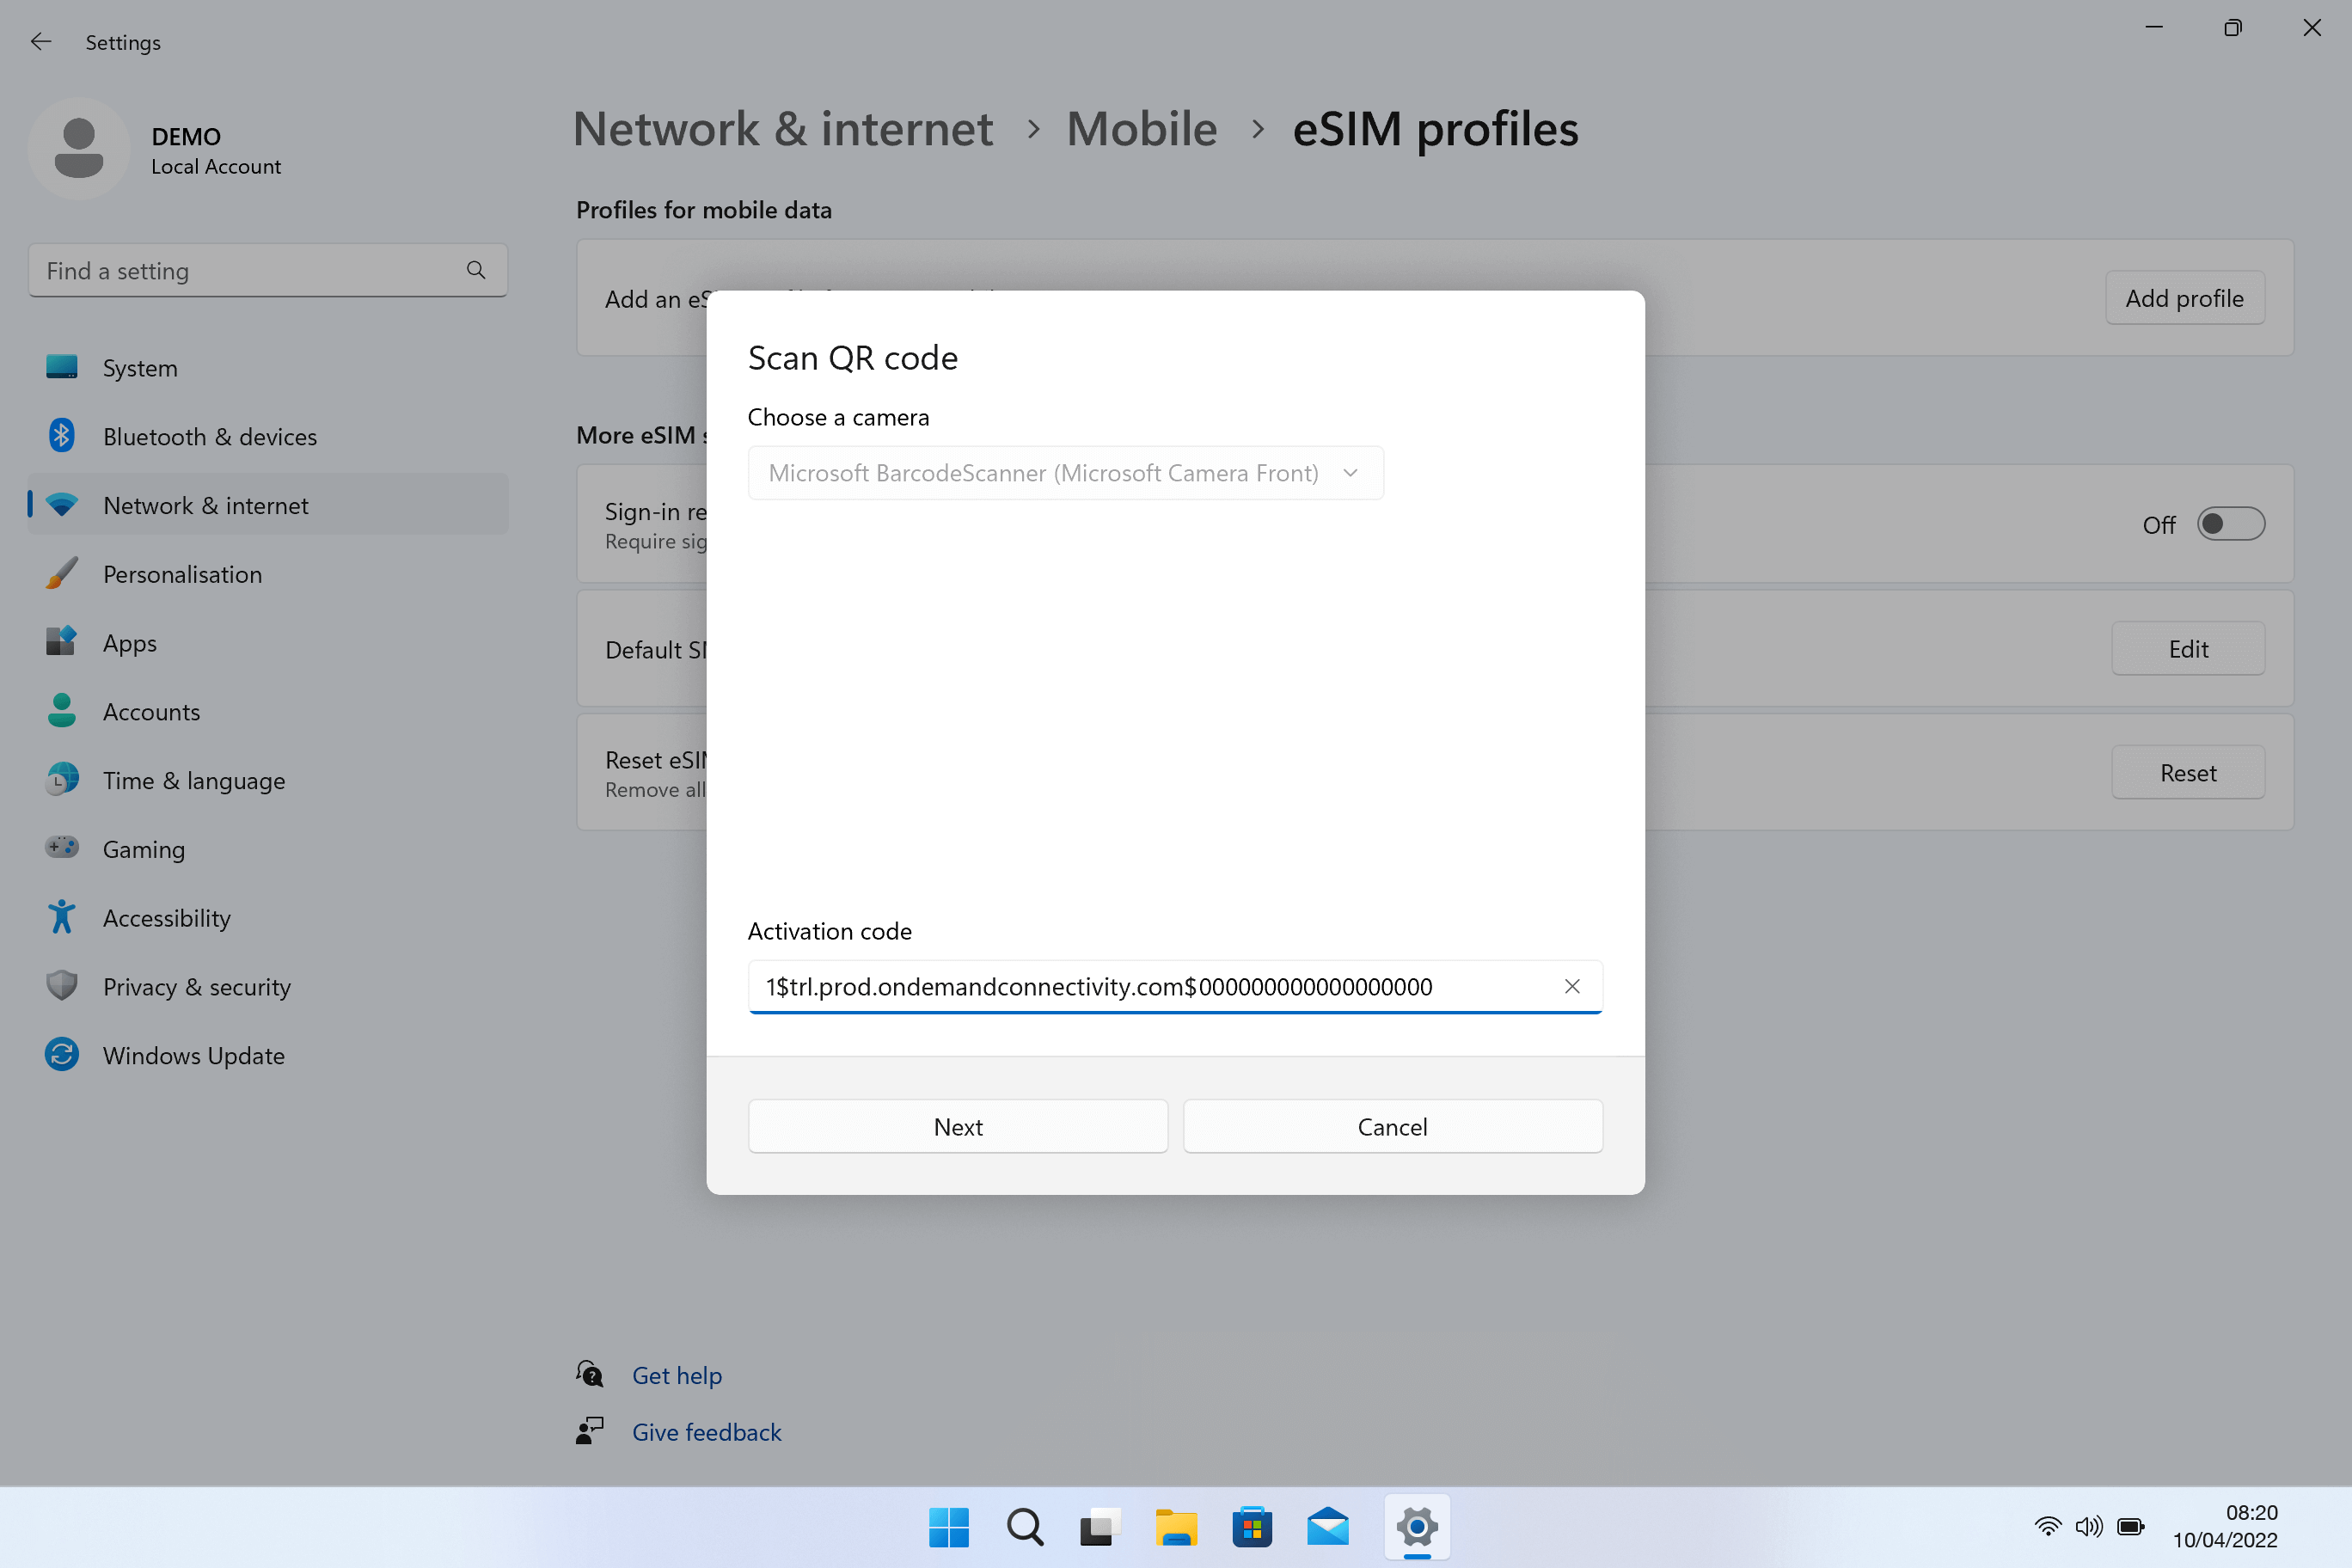
How To Install esim2trip Mobile eSIM on your laptop with QR code
Step-by-step eSIM installation guides – Windows laptop
Connect in minutes: scan or manually enter the QR code, create your account and start enjoying seamless connectivity!
01
Get your QR code for Laptop via email
You will receive your eSIM in the form of a QR code (please allow 15 minutes for receipt of the email and check your SPAM folder before contacting ).
02
Network settings screen
Go to “Settings” then “Network & Internet” & “Cellular – Connect with eSIM”
03
Add your eSIM
In “Add an eSIM profile from your mobile operator” then select “Add profile”
04
Access the dialog box
In dialog box, select “Let me enter an activation code I have from my mobile operator” > “Next”
05
Use your activation code
Please retrieve the activation code from the email that includes the QR code and insert it into the designated activation code field. Then, click on the “Next” option.
Alternatively, you can use your laptop’s camera to scan the QR code, which will automatically populate the Activation Code box.
06
Confirm the installation
To complete the download and installation of Ubigi eSIM, click on the “Yes” option.
When finished, click “Close”
07
Check that your eSIM works
In the “Network and Internet” > “Mobile” page, make sure that the new Ubigi eSIM is selected in “Use this SIM for mobile data”.
How To Use Airhub Mobile eSIM For Mobile Data
Follow these steps after you arrive at your travel destination.
01
Under Mobile network, tap Airhub Mobile (Downloaded SIM) and activate it.
02
Make sure Mobile data and Roaming are both turned on. Then scroll down and tap Advanced.